Lets begin creating the UI for City management. We will start with City search. The Country search was simple, just textbox for search input and get data from single table. State search had a dropdown for country, so that we could filter states by country, it was a new thing to learn for us. Now City search page will have a search textbox and State dropdown.
State dropdown
In src\dropdowns folder, create a new file StateDropdown.tsx. The code is very similar to the country dropdown, so we will not go in detail. You can complete the code yourself or get reference from GitHub.
The state dropdown calls the StateApi.search method, which calls our web API /api/cities/search. The controller in ASP.NET web API calls StatteService.Search method, which then calls the Search method of StateRepository. The Search method is defined in StateRepositoryExtensions class. By default the search works on single table, in this case it is State. If we use the default implementation, we get StateRes, which only contains State data, single table, we have not added data from related table yet.
Below screenshot shows the State dropdown, which shows state name as label. For well known states, we can surely recognize them from just name. But it would be much better if the dropdown also displays country name with state.
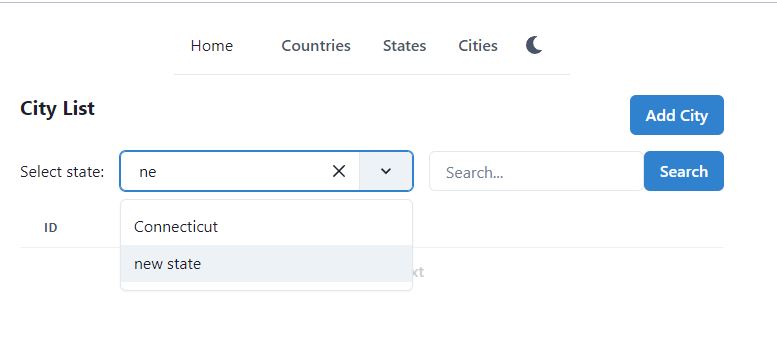
To display the country name in state dropdown, first we have to update the repository in web API. Open the web API project, open Repository\StatteRepositoryExtensions.cs file. Update the Search method and add Include method, which includes the related entity Country.
public static IQueryable<State> Search(this IQueryable<State> items,
    StateReqSearch searchParams)
{
  var itemsToReturn = items
      .Include(x => x.Country)
      .AsQueryable();

  // no update in rest of the code
}
Stop and run the ASP.NET web API project again. Open the default Swagger UI, go to States section, click on /api/States/Search GET method. In response now you should see Country data, for each state.
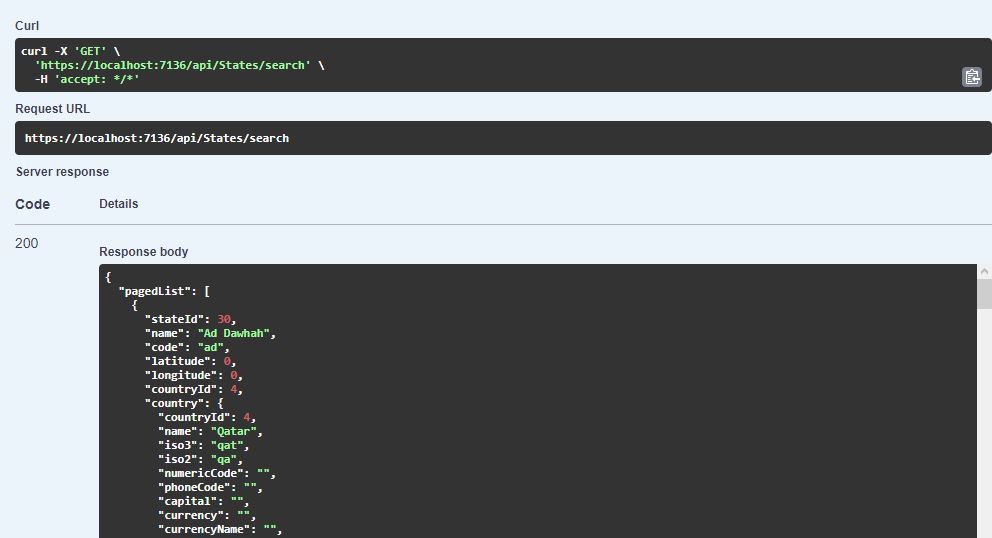 '
'
Just one Include statement and now we get the data from related table. This is too easy in Entity Framework. But beware that this can affect performance of database. Here the state has exactly one country, so it is not a big issue. But it would really hurt performance if you include data from related children e.g. Include States of a Country would fetch all states of that country. We will get to the performance issues later.
Now lets add the country name in dropdown in React. Open React project and open dropdowns\StateDropdown.jsx file. The search method here gets the response from web service, it already includes the Country data with each state. We just have to display in label.
<Select
  getOptionLabel={(c) => c?.name ? (c?.name + ", " + c?.country?.name) : ""}

></Select>
Now the state dropdown will show country name with state name. We are now ready to create the city search page.
City search page
Create a new folder src\pages\city. Add new file Cities.tsx. Type rafce and insert the default template code. Previously in state search, we called the web API in useEffect, which was updated on url search params. We will do the same in City search page too. Its code is also very similar to the State search page, so we will not repeat. You may review State search page again and practice, then complete the city search page yourself. Or you may get the complete code from GitHub.
Like we added Country dropdown in states page, here we added States dropdown in Cities page.
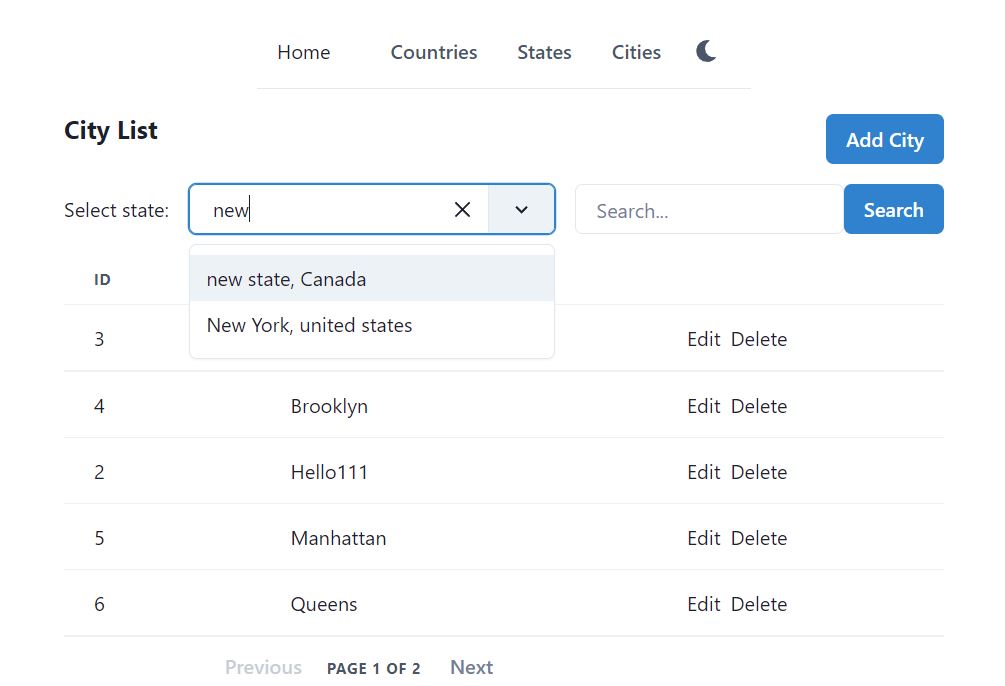
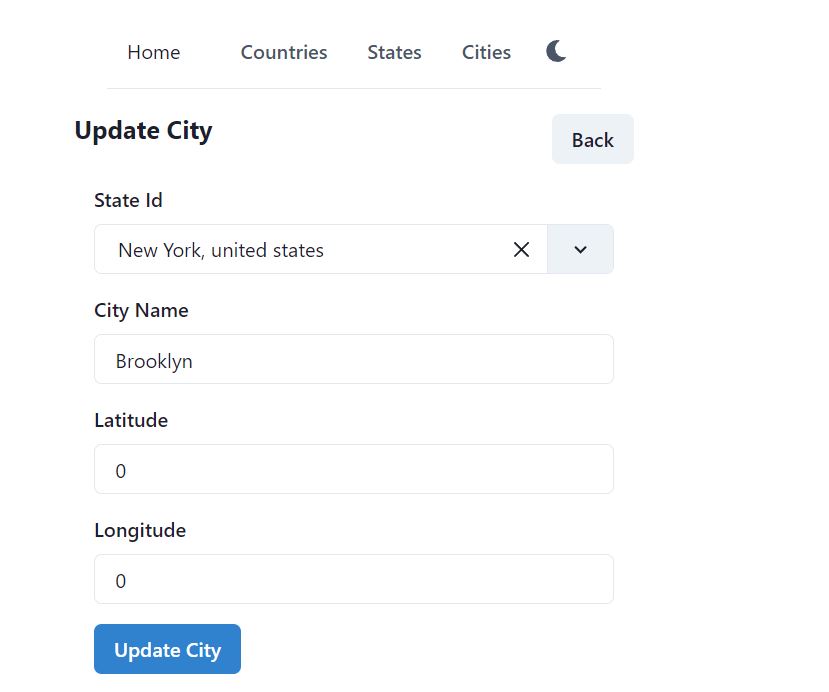
City Edit page
Open React project, add new file in src\pages\city, name it CityEdit.tsx. Type rafce and insert the default template code. The URL of city edit page will have the following formats.
- localhost:3000/cities/edit – create a new city, no state is selected in dropdown
- localhost:3000/cities/edit/{stateId} – create a new city, the state is selected in dropdown
- localhost:3000/cities/edit/{stateId}/{cityId} – update an existing city, the state is selected in dropdown
The code is just like the Edit State page. Nothing new to learn here. You may create this page yourself by referring to the code of EditCountry.tsx. The complete code is available on GitHub.
Delete City page
Create CityDelete.tsx in src\pages\city folder. The Url format is localhost:3000/cities/delete/{cityId}. We will load city dto from web API in useEffect hook, when cityId value changes. Like before, we will display city information on screen, so that the user may confirm whether he wants to delete this city. There is nothing new to learn here, the code is same as delete state. Try to create the delete page yourself. You can get the complete code from GitHub.
Save the file and run the project, try to delete a city. The web API /api/cities/{cityId} just loads the city information from the database. It does not include any relational data from state. In DTO, we have stateId and StateRes, but we are not loading from database (repository).
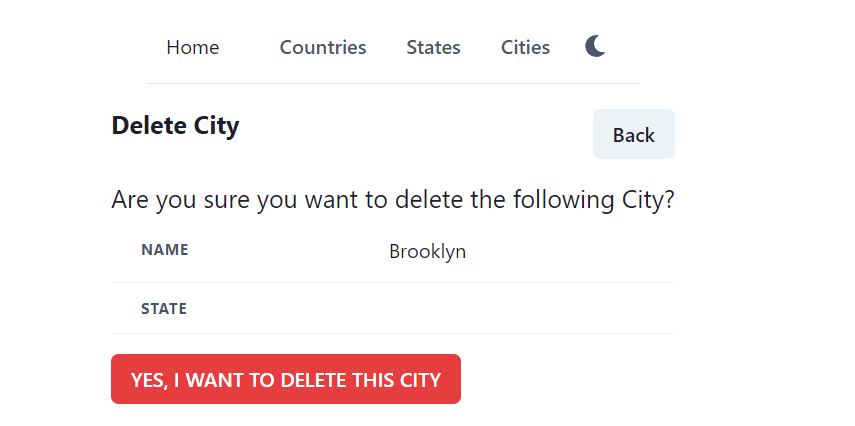
To load the data from the related table state, first we need to update in web API. Open web API project and open Services\CityService.cs file. View the Get method, which loads the city against city id. It calls FindCityIfExists method, which is being reused in Get and Delete. Add Include method and load the State as follows.
private City FindCityIfExists(int cityId, bool trackChanges)
{
  var entity = _repositoryManager.CityRepository.FindByCondition(
      x => x.CityId == cityId,
      trackChanges,
      include: i => i.Include(x => x.State))
      .FirstOrDefault();
  if (entity == null) { throw new Exception("No city found with id " + cityId); }

  return entity;
}
Stop and run the ASP.NET web API project again. Now /api/cities/{cityId} will include state data as well.
Now lets update in React project. Open CityDelete.tsx and update the showCityInfo method to include the state information as follows.
const showCityInfo = () => (
  <div>

          <Tr>
            <Th>State</Th>
            <Td>{city?.state?.name}</Td>
          </Tr>
        // other code remain same
  </div>
);
Save the file and try to delete a city again, it should show the state information with city now.
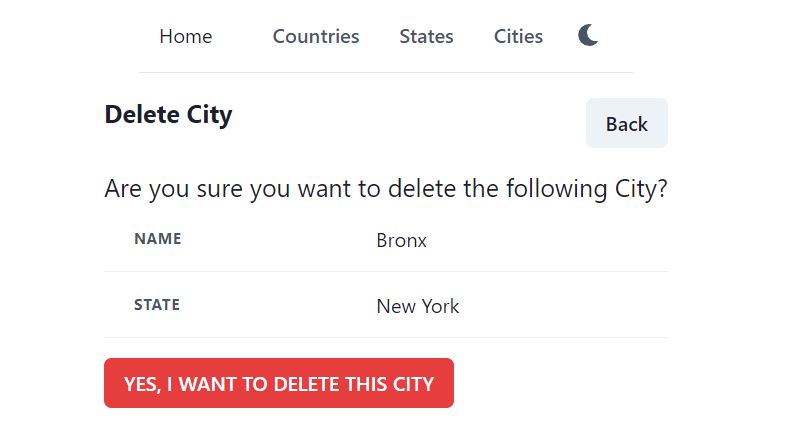
We can even display country name too, with state. CityRes dto has StateRes as its member. And StateRes dto has CountryRes. So if we just update our web API and include Country, it will be loaded as well.
Open the web API project, Services\CityService.cs file. Update FindCityIfExists method as follows. Just add x => x.State.Country in Include method. City has State, State has Country. In such scenario, there is no need to call Include multiple times, we can use single Include method to fetch child of child entity.
private City FindCityIfExists(int cityId, bool trackChanges)
{
  var entity = _repositoryManager.CityRepository.FindByCondition(
      x => x.CityId == cityId,
      trackChanges,
      include: i => i.Include(x => x.State.Country))
      .FirstOrDefault();
  if (entity == null) { throw new Exception("No city found with id " + cityId); }

  return entity;
}
Stop and run the web API project again, now /api/cities/{cityId} will include state as well as country data.
Lets update in React and display the state and country information in city dto. Open React project, open src\pages\city\CityDelete.tsx and update showCityInfo method as follows.
<Tr>
  <Th>State</Th>
  <Td>{city?.state?.name}, {city?.state?.country?.name}</Td>
</Tr>
Save the file and open delete city page, now the country name will also appear with state name. While editing the tsx file in VS Code, you might have noticed the intellisense, VS Code shows the members of dto. This is the advantage of having TypeScript (ts) in React, instead of JavaScript (js). TypeScript is strongly typed, it helps in intellisense and also detects errors during compile time.
If we had used JavaScript, there would be no intellisense, no compiler level type checking. We could do mistake when we put . to get members of a class/dto. So TypeScript is always preferrable to do programming using Object Oriented approach.

Save the file and open the delete page again, now it shows state with country information.
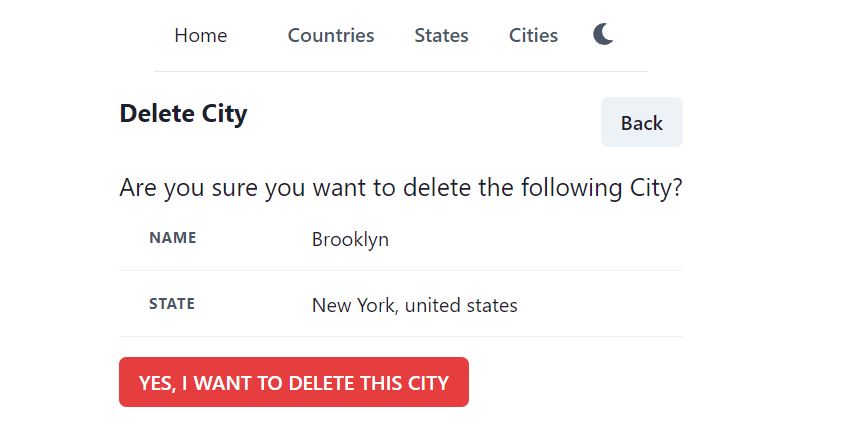
The complete code for search, edit and delete city is available on GitHub.