We have created a fully functional Address Book app, which consists of web API built with ASP.NET Core 7 and the frontend app built with React. Now we will create docker containers for both API and frontend and run it on local Docker instance. We will also upload these Docker containers to Docker Hub and then deploy our app on live website from Docker Hub.
Add Docker Support from Visual Studio 2022
Open the AddressBook project in Visual Studio, we are using the latest community edition 2023, which is free for personal use. Right click on the web API project and choose Add – container orchestrator support. From the dropdown choose Docker compose.

Choose Linux as Docker OS. For this step to succeed, Docker must be installed locally.
Visual Studio will add the basic support for dockerizing our ASP.NET web API project. It will create a new project docker-compose, which will have docker-compose.yml and docker-compose.override.yml files. It will also create another file Dockerfile in the root of the AddressBook web API project.
Open docker-compose.yml file. By default, it will have just one service for the web API. We will update the docker compose file and add 3 services as follows.
- api – ASP.NET Core web API
- db – SQL Server 2017
- web – React web app
Below are the contents of docker-compose.yml, which will work in local instance of Docker (Docker Desktop on Windows).
version: '3.4'

services:
  api:
    image: saqibrazzaq/addressbook_api
    container_name: addressbook_api
    build:
      context: .
      dockerfile: AddressBook/Dockerfile
    depends_on:
      - db
    environment:
      - ASPNETCORE_ENVIRONMENT=Production
      - ASPNETCORE_URLS=http://+:80
      #- SQLSERVER=sqlserver connection string - loaded from api.env
    env_file:
      - api.env
    ports:
      - "8010:80"
      - "8011:443"
    volumes:
      - ${APPDATA}/Microsoft/UserSecrets:/root/.microsoft/usersecrets:ro
      - ${APPDATA}/ASP.NET/Https:/root/.aspnet/https:ro
    restart: always

  db:
    image: mcr.microsoft.com/mssql/server:2017-latest
    container_name: addressbook_db
    volumes:
      - db_data:/var/opt/mssql/data
    environment:
      #MSSQL_SA_PASSWORD: password - loaded from db.env
      ACCEPT_EULA: "Y"
      MSSQL_PID: "Express"
    ports:
      - "1450:1433"
    env_file:
      - db.env
    restart: always

  web:
    image: saqibrazzaq/addressbook_web
    container_name: addressbook_web
    environment:
      CHOKIDAR_USEPOLLING: "true"
    build:
      context: ./react-client
      target: production
    ports:
      - "8013:80"
      - "8014:443"
    stdin_open: true
    tty: true
    depends_on:
      - api
    restart: always

volumes:
  db_data:
Lets go through some of the blocks in each service
services – api
- image – the name which will be used in hub.docker.com
- container_name – the name which will appear in docker instance
- build – contains the path of ASP.NET web API Dockerfile
- depends_on – the API depends on db service
- environment – we have set the environment to production. Note that we only used port 80 for http, for local Docker. We will use https when we will upload to dockerhub and deploy to live website
- env_file – load environment variables from api.env file
- ports – When the container is deployed to local Docker, we can access from browser on port 8010. Internally, it will run on port 80
The environment variables are loaded from api.env. We have provided api.env.sample file in the GitHub repository, you can rename this file to api.env and update the password and secret keys on your local machine. Original .env files are not uploaded to GitHub repository. The contents of api.env are
SQLSERVER=server=addressbook_db;database=AddressBook;User id=sa;Password=Pa$$word!;MultipleActiveResultSets=true;TrustServerCertificate=True;
CLOUDINARY_CLOUD_NAME=your-account-com
CLOUDINARY_API_KEY=1234
CLOUDINARY_API_SECRET=abc1234xyz
services – db
- image – the name on hub.docker.com, it is set by Microsoft, as it is their software
- container_name – the name which will appear in local docker instance
- ports – Inside the Docker it will run on default port 1433, if we want to access this SQL Server instance from outside Docker, it is accessible via port 1450
- env_file – load environment variables from db.env
The db.env file contains MS SQL Server password for sa user. db.env file is in gitignore, so it is not available on GitHub, but we have provided db.env.sample file, you can rename it to db.env and change the password as your own SQL Server instance. The contents of the db.env are below.
MSSQL_SA_PASSWORD=Pa$$word!
services – web
- image – the name on hub.docker.com, when we upload this container to docker hub, it will use this name
- container_name – the name which will appear in local Docker instance
- ports – Inside docker, it will use port 80 for http and 443 for https. Outside Docker, if we want to access the React app from browser, it will use port 8013 for http and 8014 for https
- build – contains the path of Dockerfile for React app
Dockerfile for ASP.NET Core web API
In the docker-compose.yml, we have build section, which has path to the Dockerfile, which exists in the root of the AddressBook web API project. This is generated by Visual Studio. We will not make any change in it. The default Dockerfile builds the project for Docker, which is good for us.
Dockerfile for React Web App
We created the React project with npx create-react-app command. So far we have been running the React project with npm start. To build the Docker container, we need to create a Dockerfile for it. Create a new file Dockerfile in the root of React project, where package.json is present. Add the following code in the Dockerfile.
FROM node:alpine AS builder
ENV NODE_ENV production
WORKDIR /app
COPY package*.json .
RUN npm install
COPY . .
EXPOSE 80
RUN npm run build

FROM nginx:alpine as production
ENV NODE_ENV production
WORKDIR /app
# Copy built assets from builder
COPY --from=builder /app/build /usr/share/nginx/html
# Add your nginx.conf
COPY nginx.conf /etc/nginx/conf.d/default.conf
# Expose port
EXPOSE 80
# Start nginx
CMD ["nginx", "-g", "daemon off;"]
React is a JavaScript based library, we need node to build and run the React app, so we use node image to install and build the React app in the /app folder. To host the React app, we also need a web server, so we use nginx to host the build files. The above Dockerfile copies nginx.conf from project folder to the Docker container, so we also need to create it. Create a new file nginx.conf in the React project root, where package.json is present. Add the following code in nginx.conf. This is a very basic nginx configuration, which listens to requests on port 80.
server {
  listen 80;

  location / {
    root /usr/share/nginx/html/;
    include /etc/nginx/mime.types;
    try_files $uri $uri/ /index.html;
  }
}
The docker build process will load environment variables from .env.production. Open the .env.production from React project root and add the following line. We have used port 8010 in docker-compose.yml file for web API, so we will use http://localhost:8010/api as base url in the env file. React will load this environment variable and set the base url in the app.
REACT_APP_API_BASE_URL=http://localhost:8010/api
Run AddressBook App in Local Docker Instance
Now that we have create all the necessary docker files and related configuration files, we can build and run our containers in local Docker.
Open the Windows Terminal app, change the directory to the main folder of AddressBook project, where .sln and docker-compose.yml are present. Run the following commands.
docker compose build
docker compose create
docker compose start
docker ps
The build command will take some time if you are running the build command for the first time. The docker will download the images from hub.docker.com if they do not exist locally. After build, we create the containers and then run these. The last command docker ps will display the running containers. It should show the following output.

If you are running Docker Desktop on Windows, you can also check the running containers in Docker Desktop. It will show the output like below.

URLs to Access Web API and React App Running in Docker
If there is error in build and publish process, all 3 services should be running from the local Docker instance. Below are the Urls to access these services.
- http://localhost:8010/api/countries – ASP.NET Core Web API for countries
- http://localhost:8013/contacts – React app
You can use your local browser to open the above URLs.
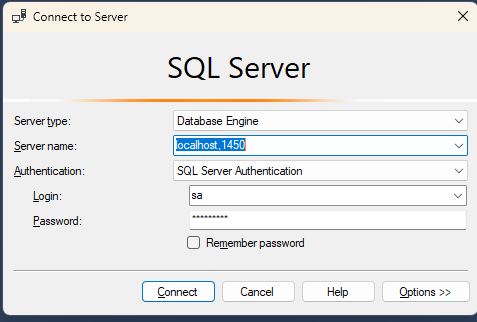
3rd service running in the Docker is MS SQL Server 2017. You can also access the SQL Server container from Docker using SQL Server Management Studio with the following credentials.
Server name: localhost,1450 Login: sa Password: what you wrote in db.env

Deploy Containers to Live Website
So far we have run the application on
- localhost directly from Visual Studio debug/run and npm start commands
- local Docker
Now we will deploy and run our application on live website.
To deploy app on local Docker, we built Docker container from source code. As a developer we have source code on local system, so we do the build and publish process on local machine and deploy to local Docker installation.
To deploy app on live website, we cannot just copy the source code on live website and run the build commands there. Instead, we will publish our containers on Docker hub. On the live website, we will download and run containers from docker hub. No build process on live website. On live website, we just download images from hub.docker.com and run them. We only provide environment variables and configurations using docker-compose files.
Prepare Website and Host/VPS for Installation
First we need to prepare our website where we will run the app. We need the domain and VPS for deploying to our website
Domain Settings
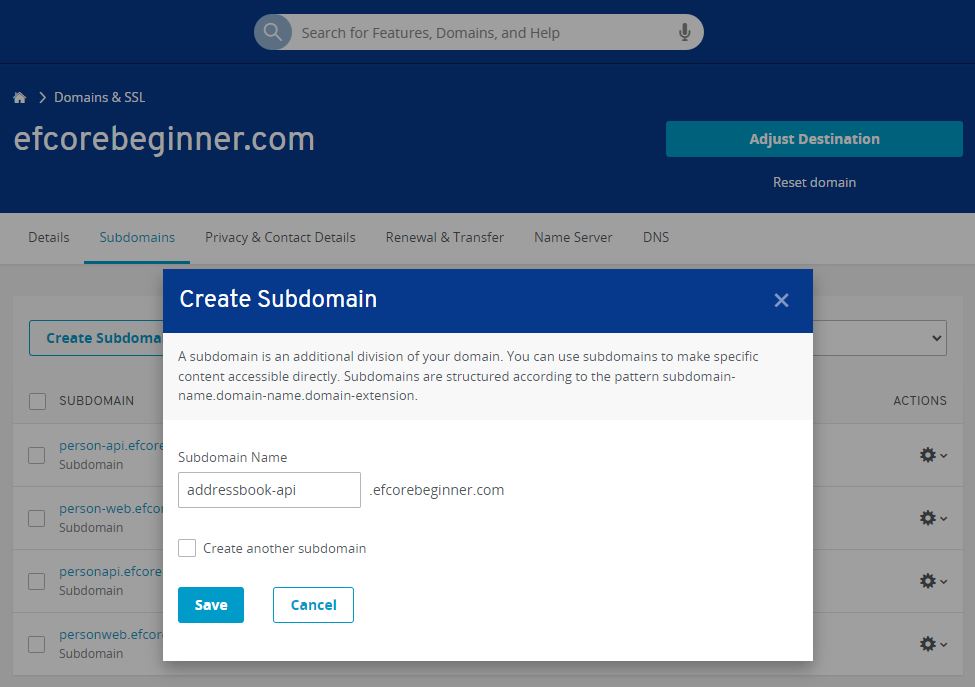
You need to buy a domain name so that users can easily access your website. In our case we will use two subdomains.
subdomain for web API e.g. addressbook-api.efcorebeginner.com subdomain for React app e.g. addressbook-web.efcorebeginner.com
A subdomain should be easy to create using the provider’s website. We use ionos.com for hosting and VPS. It is very easy to create a new subdomain.

VPS Settings
We will use VPS for hosting our website. With VPS, we are independent to install an Operating System of our own choice. We can install any software on it. We used VPS services from ionos.com. We installed Ubuntu image on our VPS, then installed Docker engine, configured Nginx reverse proxy with Lets Encrypt ssl companion. With this setup, we can add any new container mapped with the subdomain, it will get ssl registered and renewed automatically. We covered it in more detail in https://efcorebeginner.com/person-react/docker-live-domain-vps/. You should read this article in detail and do step by step configuration to install the Docker engine with reverse proxy and Lets Encrypt companion.
Prepare the Source Code and Configuration Files
ASP.NET Core Web API Project
In ASP.NET web api project, open Extensions\ServiceExtensions.cs file. Go to ConfigureCors method. It contains the list of allowed websites who can call the web API. We have allowed localhost already. So we will allow our React subdomain as well.
public static void ConfigureCors(this IServiceCollection services)
{
  services.AddCors(options =>
  {
    options.AddPolicy("CorsPolicy", builder =>
    {
      builder
      //.AllowAnyOrigin()
      .WithOrigins(
          "http://localhost:3000",
          "http://localhost:8013",
          "https://addressbook-web")
      .AllowCredentials()
      .AllowAnyMethod()
      .AllowAnyHeader();
    });
  });
}
React App
Open React project in Visual Studio Code and open .env.production file. It contains the URL of the web API, which acts as a base url in Axios. We used localhost address here, for deployment on live website, we will update and give the live Url here.
REACT_APP_API_BASE_URL=https://addressbook-api.efcorebeginner.com/api
Publish Images on Docker Hub
After making the above changes in above configuration files, lets build the source again with docker compose.
docker compose build
Note that in the docker-compose.yml, we already set the image names with our own docker user account e.g. saqibrazzaq/addressbook_api. You should use your own account name.
After the build process completes, run the docker login command. Provide username and password if required. After authentication is successful, run the docker push command, which will upload the Docker images from your local system to hub.docker.com.
docker login
docker compose push
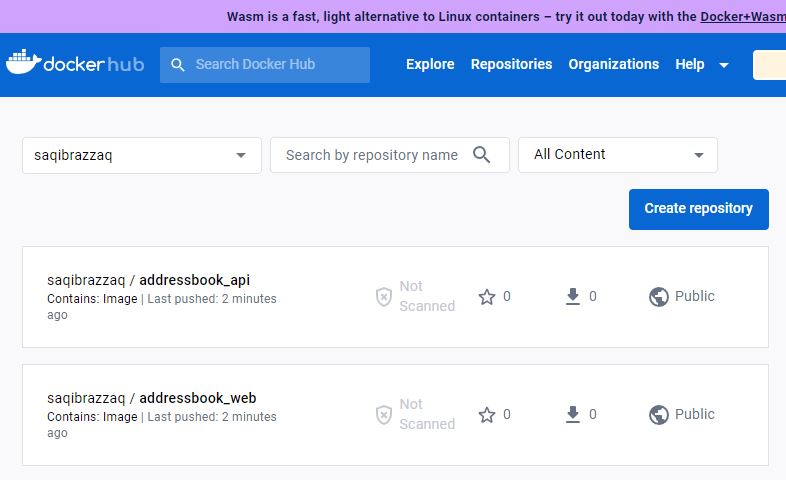
You should also verify by opening https://hub.docker.com/ in your browser. Make sure that your images are successfully uploaded to the Docker hub.

docker-compose.yml file for Installation on Live Website
So far we worked on docker-compose.yml file for building and publishing our local Docker instance. We used the same docker-compose.yml file for uploading our images to hub.docker.com.
Now we will create another docker-compose.yml file, to install our app on the live website.
Why create different file for install? Because docker-compose.yml created by Visual Studio is for building the Docker images from source code. They need reference to ASP.NET and React’s Dockerfile files. To install on live website, we do not need to build from source code. We only need the necessary configuration to load images from hub.docker.com and provide values and secret keys in environment variables.
In the AddressBook folder where .sln file is present, create a new folder docker-install. In docker-install folder, create a new file docker-compose.yml. Add the following contents.
version: '3.4'

services:
  api:
    image: saqibrazzaq/addressbook_api
    container_name: addressbook_api
    depends_on:
      - db
    environment:
      VIRTUAL_HOST: addressbook-api.efcorebeginner.com
      LETSENCRYPT_HOST: addressbook-api.efcorebeginner.com
      LETSENCRYPT_EMAIL: "youremail@gmail.com"
      SQLSERVER=server: addressbook_db;database=AddressBook;User id=sa;Password=pwd;MultipleActiveResultSets=true;TrustServerCertificate=True;
      CLOUDINARY_CLOUD_NAME: account-com
      CLOUDINARY_API_KEY: 123
      CLOUDINARY_API_SECRET: abc123xyz
    expose:
      - 80
    networks:
      - nginx-proxy
      - addressbook_db
    restart: always

  db:
    image: mcr.microsoft.com/mssql/server:2017-latest
    container_name: addressbook_db
    volumes:
      - db_data:/var/opt/mssql/data
    environment:
      ACCEPT_EULA: "Y"
      MSSQL_PID: "Express"
      MSSQL_SA_PASSWORD: pwd
    ports:
      - "1433"
    networks:
      - addressbook_db
    restart: always

  web:
    image: saqibrazzaq/addressbook_web
    container_name: addressbook_web
    environment:
      VIRTUAL_HOST: addressbook-web.efcorebeginner.com
      LETSENCRYPT_HOST: addressbook-web.efcorebeginner.com
      LETSENCRYPT_EMAIL: "youremail@gmail.com"
      CHOKIDAR_USEPOLLING: "true"
      REACT_APP_API_BASE_URL: https://addressbook-api.efcorebeginner.com/api
    expose:
      - 80
    depends_on:
      - api
    networks:
      - nginx-proxy
    volumes:
      - /app/node_modules
      - ./person_web:/app
    restart: always

volumes:
  db_data:

networks:
  nginx-proxy:
    external: true
  addressbook_db:
    internal: true
Install on Live Website from Docker Hub
Now we will use the above docker-compose.yml to install app on our live server. We have a VPS and installed Linux with Docker engine on it. Nginx reverse proxy with LetsEncrypt SSL companion is also installed and working. Login to the VPS with ssh command. Create a new folder install-addressbook with mkdir command. Then download the docker-compose.yml, which we created for installation in this folder with wget command.
ssh user@host
mkdir install-addressbook
wget https://github.com/saqibrazzaq/efcorebeginner/raw/main/AddressBook/docker-install/docker-compose.yml
You only need to update the secret keys and passwords in this file. Edit this file with nano command. After you updated the secret keys and passwords, press Ctrl+O to save changes and Ctrl+X to exit nano.
nano docker-compose.yml
Now we are all set to install and run the AddressBook app. Run the following command. It will read the docker-compose.yml file and download the necessary images from Docker. Then it will create and start the containers. Verify with docker ps command.
sudo docker compose up -d
sudo docker ps
If there is no error during the images download and containers creation and run, the app will be available on the URL https://addressbook-web.efcorebeginner.com