You are reading the 6th article in the beginner series of the Entity Framework Core with ASP.NET web API. We are using best practices to write .NET web API using EF Core. Since it is a beginner series, we are only using single table to keep things simple.
In the last article we created service to manage Persons. The service deals with the repositories. The service uses DTOs to send/receive data from the client/controller.
In this article we will create Person controller, which will be an endpoint for the client. The clients will call the controller methods directly, using the API Url.
PersonsController
In an ASP.NET Web API project, you will already have an existing folder named Controllers. It has a default WeatherForecaseController.cs file. Delete it. Right click on Controllers folder and add a new Controller. Choose API – API Controller – Empty in the dialog box. Name the file as PersonsController.cs. It is also convention to use plural names for controllers.
The controller only need to access Services. No repository should be used in controller, as it will break our layered design.
Add IPersonService as a private member in the controller and initialize it in the constructor. Your controller class should look like below.
[Route("api/[controller]")]
[ApiController]
public class PersonsController : ControllerBase
{
  private readonly IPersonService _personService;

  public PersonsController(IPersonService personService)
  {
    _personService = personService;
  }
}
By creating this controller, we have created a new API endpoint with the url /api/Persons. We also initialized the person service in the controller.
Next we will add a post method for creating a new Person. See the code snippet below to create the new method.
[HttpPost]
public IActionResult Create(PersonReqEdit dto)
{
  var res = _personService.Create(dto);
  return Ok(res);
}
In one line, we created a new Person with the service. And in the second line we returned the response, the newly created Person to the client.
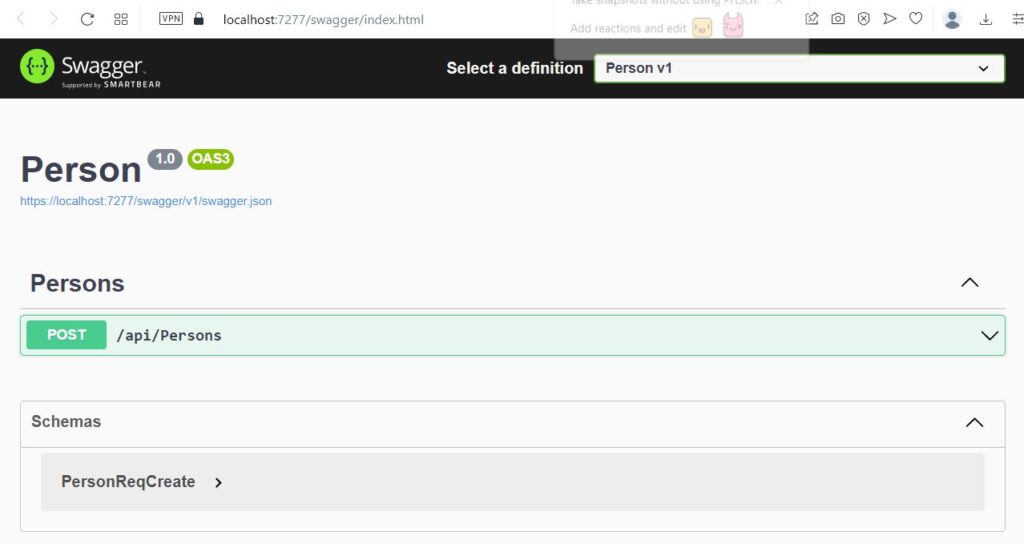
Run the project, it will open the Swagger UI by default. Since a web API is pure backend web service, we need a client, another app to test it. Visual Studio by default provides Swagger UI to test the APIs. You should see Persons controller and one post method like below.

Click on the Post link, it will show Example value and schema. If you post an API on public server, the request parameters are exposed to public. If we did not have DTOs, we would have used Entities as parameter and return types. This way the schema can be exposed to the public, which is very bad practice. That is why we used DTOs.
Click on Try it out button, it will set some default values in the request body. You can click on Execute to actually call the Create method in the controller. Click it now and see if it creates a new Person or not. It will give error
System.InvalidOperationException: Unable to resolve service for type 'Person.Services.IPersonService' while attempting to activate 'Person.Controllers.PersonsController'.
   at Microsoft.Extensions.DependencyInjection.ActivatorUtilities.GetService(IServiceProvider sp, Type type, Type requiredBy, Boolean isDefaultParameterRequired)
We have initialize IPerson interface in the controller’s constructor. This technique is called dependency injection. We can use any class this way. But we also have to initialize it first time in Program.cs. We registered other services previously using the extension methods in the ServiceExtensions.cs file.
Open Extensions\ServiceExtensions.cs file and add the two methods below.
public static void ConfigureRepositoryManager(this IServiceCollection services)
{
    services.AddScoped<IRepositoryManager, RepositoryManager>();
}

public static void ConfigureServices(this IServiceCollection services)
{
    services.AddScoped<IPersonService, PersonService>();
}
Call these methods in Program.cs, so your code should look like this.
// Add services to the container.
builder.Services.ConfigureEnvironmentVariables();
builder.Services.ConfigureSqlContext();
builder.Services.ConfigureAutoMapper();
builder.Services.ConfigureRepositoryManager();
builder.Services.ConfigureServices();
Now we have 5 extension methods registering various services we used.
Any class that needs to be used via the dependency injection, must be registered in Program.cs. So we added a method for registering the RepositoryManager and another method for registering the PersonService.
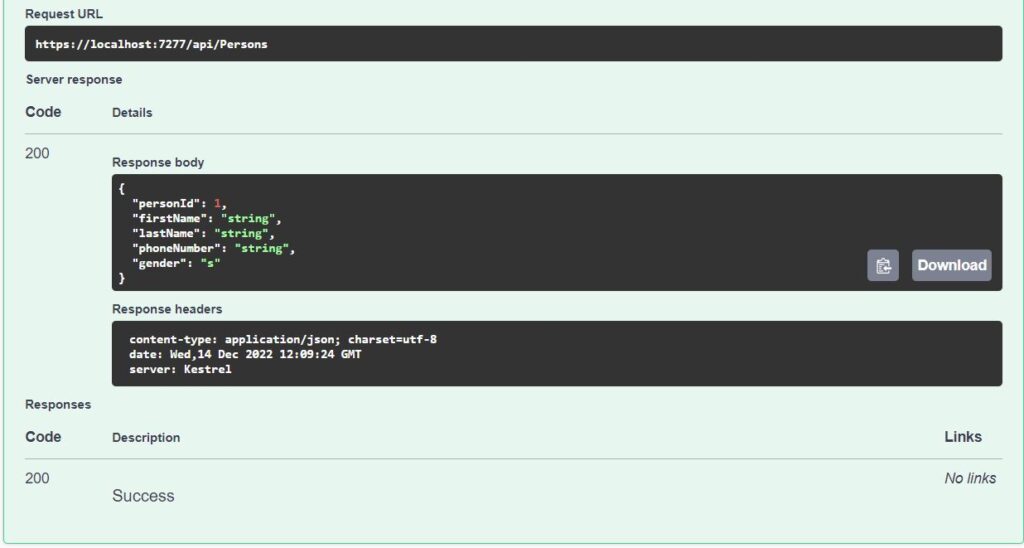
Now run the project, click on the Post link, then Try it out button. Keep the data as it is. Click on the Execute button at the bottom. Scroll down and you should now see server response 200 Ok as below.

200 Ok means the API executed successfully. New person is now created in the database. Open the SQL Server Management Studio, connect to the database and run the following query to verify the data.

Congratulations!! you have successfully created a new record in SQL Server using the Entity Framework with good design practices.
Debug Controller to see what is going on
At this stage, I would recommend you to take a break and spend some time debugging the code.

The HttpPost method takes PersonReqEdit as parameter. This parameter is shown in swagger and based on this DTO public members, swagger displays in the request body
{
  "firstName": "string",
  "lastName": "string",
  "phoneNumber": "string",
  "gender": "s"
}
This data is sent from Swagger to the controller, in PersonReqEdit dto.
The controller uses Person Service and just calls service’s Create method. It passes the same dto, which it received from swagger client.

The service receives the Dto from controller. It is the job of service to use the Repository manager and do CRUD operation as required. It converts the Dto to the database entity. Once we get an entity, we can insert it in the Repository. Save method will actually save the data from the entity class to the SQL Server database.
After calling save, the entity will also have updated PersonId, auto incremented primary key. We use mapper again to convert entity to response Dto.
In the next article, we will cover how to update, delete and list all the persons.