In this article we will create docker containers for our web API. Docker containers are very fast, they are not like virtual machines, they only contain bare minimum environment to run the app. When container starts, only our app and its dependencies are initialized. In virtual machines, the whole OS/hardware is virtualized and it takes a lot of time to initialize the virtual machines. That makes Docker containers the ideal choice for virtualization.
We will create containers using docker compose. Once you have docker compose file, you can use it to deploy the app to any Docker instance easily using docker commands. All the dependencies and environment is set by docker-compose.yml file.
Add Docker support with Visual Studio 2022
Since we are using Microsoft Visual Studio 2022 Community Edition for development of web API, it comes with good support for dockerizing the app. Open the project in Visual Studio, right click on Persons web API project, in menu go to Add -> container orchestrator support. From the dropdown choose Docker compose.

It will then ask to choose Docker OS from the dropdown, choose Linux. Visual Studio creates the following when you add Container support using this method
- Dockerfile is created at the root of Person project
- A new docker-compose project is added in the solution. It contains two files
- docker-compose.yml
- docker-compose.override.yml
Both the docker-compose and override yml files are created in the solution root folder. We can manually create the above three files if we want. But it is quite handy to let Visual Studio generate these files for us. These are good for start. We will update these files to create and run our docker containers.
Install Docker on local system
First we will run the API on local Docker. Install and update Docker on your local system, if not done already. Also make sure that the Docker service is running. You can verify by running the following command in Terminal.
docker ps
It will display list of running containers. I am on a Windows system for development and installed Docker Desktop for Windows. There are no containers currently running. It shows the following output.

In Visual Studio, we originally started with single project of type ASP.NET Web API. When we added container support, Visual Studio created the docker files for the web API project.
Our API depends on Microsoft SQL Server database. We will also add container for SQL Server as well.
Warning: We do not recommend adding containers for data storage like SQL Server for production environments or medium/large scale systems. We only use database containers for testing and development purpose.
Auto migration of SQL Server database
In local system, we used SQL Server Express edition for our database. SQL Server installation is required on local system for API to run successfully. We used add-migration and update-database commands from Visual Studio Package Manager Console, to update database from entities. We will have to do the same when we add database to the container, but that would ne highly inefficient. Container deployments and updates are supposed to be single command operation.
We will use Entity Framework to auto migrate the database in the container on application startup. Using this method, the database schema will be updated to the latest changes.
Open web API project in Visual Studio, open Extensions\ServiceExtensions.cs file. Add a new extension method as follows.
public static void MigrateDatabase(this IServiceCollection services)
{
  var dbContext = services.BuildServiceProvider().GetRequiredService<AppDbContext>();
  dbContext.Database.Migrate();
}
We also need to call this method from Program.cs. Open Program.cs and call this method. This will be the 7th extension method
// Add services to the container.
builder.Services.ConfigureSqlContext();
builder.Services.ConfigureAutoMapper();
builder.Services.ConfigureRepositoryManager();
builder.Services.ConfigureServices();
builder.Services.ConfigureCors();
builder.Services.MigrateDatabase();
If database container is created in Docker for the first time, MigrateDatabase method will create the database and run all the migrations. And if the container is updated, the app will try to execute all the pending migrations, if available. This way the database container in Docker will always have the latest schema.
This approach is suitable for quick and easy database setup, recommended for development and small sized applications. For medium or large systems, the database must be handled by the database administrators on dedicated instances, where proper tuning, backup and database maintenance tasks can be done by the DBAs.
Update docker-compose.yml
Now we are ready to update docker-compose.yml file created by Visual Studio. Visual Studio creates docker-compose.yml and docker-compose.override.yml files. In our example, we will copy the contents of docker-compose.override.yml in docker-compose.yml file. We will have only one docker-compose file, it is easy to run docker commands with single default file.
Delete docker-compose.override.yml file. Open docker-compose.yml, it should have the following contents.
version: '3.4'

services:
  api:
    image: saqibrazzaq/person_api
    container_name: person_api
    build:
      context: .
      dockerfile: Person/Dockerfile
    depends_on:
      - db
    environment:
      - ASPNETCORE_ENVIRONMENT=Production
      - ASPNETCORE_URLS=http://+:80;https://+:443
      - SQLSERVER=server=person_db;database=Person;User id=sa;Password=Pa$$Word111;MultipleActiveResultSets=true;TrustServerCertificate=True;
    ports:
      - "8001:80"
      - "8002:443"
    volumes:
      - ${APPDATA}/Microsoft/UserSecrets:/root/.microsoft/usersecrets:ro
      - ${APPDATA}/ASP.NET/Https:/root/.aspnet/https:ro
    restart: always

  db:
    image: mcr.microsoft.com/mssql/server:2017-latest
    container_name: person_db
    volumes:
      - db_data:/var/opt/mssql/data
    environment:
      MSSQL_SA_PASSWORD: "Pa$$Word111"
      ACCEPT_EULA: "Y"
      MSSQL_PID: "Express"
    ports:
      - "1441:1433"
    restart: always

volumes:
  db_data:
Lets have some explanation of the contents of docker compose file now.
There are two main sections in the docker file, services and volumes. Services represent the container in docker. Visual Studio created only one service by default, for the API project. We added the db service for the database container. The volumes section creates the storage folder in system where Docker is installed. These folders are managed by Docker to store data. The volumes are useful for data containers. When containers are removed or updated with new version, they keep their data using volumes.
image: This is the global name which is registered in the Docker registry dockerhub.com. In db, the image is mcr.microsoft.com/mssql/server:2017-latest, this name is given by Microsoft on dockerhub.com, because it is owned by Microsoft. In api, the image is saqibrazzaq/person_api. This image is owned by me, I can upload it on dockerhub.com. You can also give your name like dockeraccount/person_api and upload it on dockerhub.com.
container_name: This is name that will identify the container on Docker. When you give docker ps command on terminal, this name will be used.
api – build: This tells docker how to build the web API project. dockerfile contains the path Person/Dockerfile, which contains commands for building .NET web API image. This docker file is also created by Visual Studio. We will not modify it. By default this file creates Release build, which will be deployed to Docker.
api – depends_on: The web API depends on db (SQL Server). It tells Docker to create the db container before the api.
environment: This section creates system environment variables for the Docker container. In .NET web API, these values are accessible with Environment.GetEnvironmentVariable(“VARIABLE_NAME”) method. api has 3 environment variables
- ASPNETCORE_ENVIRONMENT=Production By default this is set to Production. In Program.cs we used app.Environment.IsDevelopment() method to do different operations for Development build
- ASPNETCORE_URLS=http://+:80;https://+:443 The default URL format with ports
- SQLSERVER=connectionstring This contains the connection string for SQL Server that is running in Docker.
Previously we created .env file for the connection string and loaded it with DotNetEnv library. Update Program.cs and call ConfigureEnvironmentVariables extension method as follows.
if (app.Environment.IsDevelopment())
{
  app.UseSwagger();
  app.UseSwaggerUI();
  builder.Services.ConfigureEnvironmentVariables();
}

builder.Services.MigrateDatabase();
We also have to call MigrateDatabase method after we configure the environment variable, so that the .env file gets loaded first and connection string is initialized.
When we run the project from Visual Studio, the environment is Development. And we are loading the connection string from SQLSERVER variable in .env file using DotNetEnv library. In the connection string, server=.\sqlexpress means we are using localhost SQL Express instance.
When we run with docker-compose, we set the environment to Production, we specify SQLSERVER environment variable in docker-compose.yml file. We will write the connection string of SQL Server in Docker in this file. In the connection string, server=person_db is the name of the container image, so that API will use Docker SQL Server instance.
ports: Both api and db uses ports. The port is used like 8001:80. Within Docker the API will run on port 80. Outside Docker, the API can be accessed with 8001 port. Same is the case with SQL Server, we wrote 1441:1433. Within Docker, the SQL server runs on port 1433. The web API is in Docker, so it will connect to SQL Server on port 1433. Outside Docker, we can connect to this instance using localhost:1441.
Run with Visual Studio and verify connection string
Lets verify the connection string by printing the value of SecretUtility.SqlServer. Update Program.cs as follows.
Console.WriteLine("SQL Server connection string");
Console.WriteLine(SecretUtility.SqlServer);

app.Run();
Open Visual Studio and Debug/Run the project, it should print the connection string from the .env file.

Run with local Docker
Our docker-compose.yml file is ready. Follow the steps below to run on local Docker
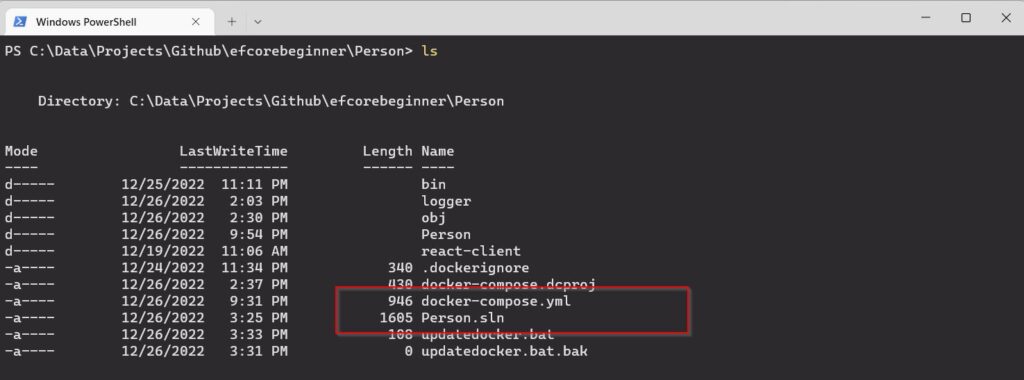
Open the Terminal. Change directory to the folder where the .sln and the docker-compose.yml file exists.

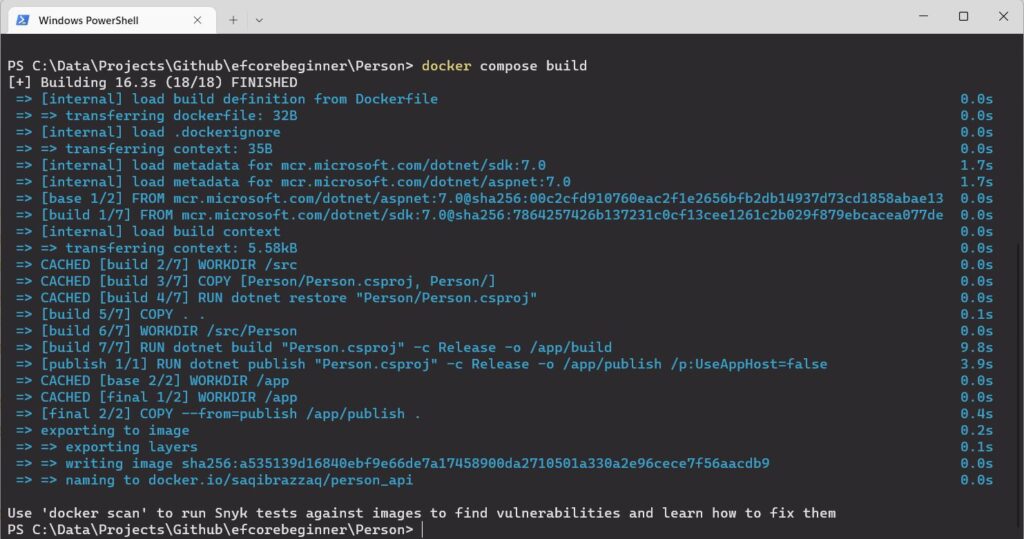
First step is to build docker images with the following command. It will build the web API project and docker image locally.
docker compose build

First time this may take some time to download the dependencies like SQL Server and .NET sdk docker images. The build should be successful. If there is any error, read and review this article again. You can also get the working project and files from the GitHub repository https://github.com/saqibrazzaq/efcorebeginner/blob/main/Person/docker-compose.yml.
Next step is to create the containers in Docker. Do it with the following command.
docker compose create

Final step is start these containers with the following command.
docker compose start

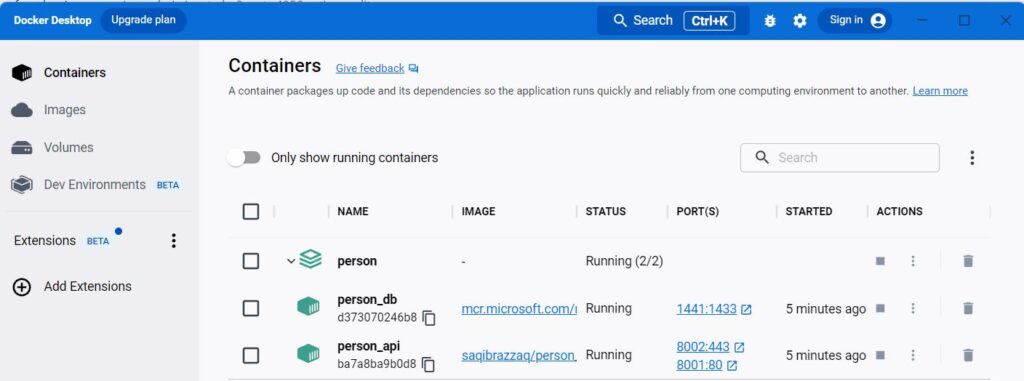
If you have Docker Desktop for Windows, you can open the Docker Desktop and see the running containers.

On terminal, you can also check running containers with docker ps command as follows
docker ps

On Docker Desktop, click on the person_api container, it will open the Logs. The logs should display some messages from Entity Framework about database initialization and migration. We printed connection string in Program.cs, the logs should also print the connection string from the docker-compose file. If the connection string is not from the docker-compose file, then there is something wrong.
In docker-compose.yml, we mentioned port 8001:80. In your browser, open the URL http://localhost:8001/api/persons. Now you are accessing the web API which is deployed to Docker.

It returns all Persons in the database. Since the container is just created on Docker, there are 0 records, it returned empty array.
Update web API on Docker
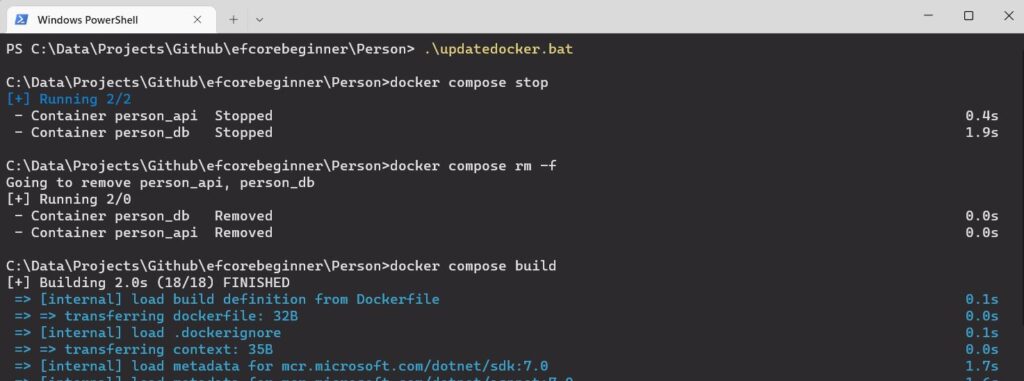
When you update the code in the web API project, the containers in Docker need to be rebuild and updated. You have to stop the containers, remove them, rebuild the images again, create and then run the containers. You have to run 5 docker commands to do these operations. You can manually type in these commands or create a batch file to run these commands in one go. We will create a batch file. Go to the main folder where .sln and docker-compose.yml file exists. Create a new file named updatedocker.bat. Add the following commands in the bat file and save it.
docker compose stop
docker compose rm -f
docker compose build
docker compose create
docker compose start
Now you just have to run the batch file whenever you want to update containers in Docker. To run the batch file, just type its name in Terminal and press enter.

Move passwords and secrets outside of docker-compose.yml
docker compose files are committed to development repositories. They should not contain passwords and secret API keys in the environment section. We can create external .env files and keep all passwords and secret keys in .env files. .env files must not be committed to repository. By default Visual Studio creates .dockerignore file and adds rules and .env files are ignored in commits.
In our project, we have two services, api and db. api has connection string environment variable that contains SQL Server password. db also has environment variable for SQL Server SA password. We will create two .env files.
.env file for web API
Create api.env file in the main folder where .sln, docker-compose.yml exists. Copy the SQLSERVER=connectionstring part and paste in api.env as follows.
SQLSERVER=server=person_db;database=Person;User id=sa;Password=Pa$$word111;MultipleActiveResultSets=true;TrustServerCertificate=True;
Update api section in docker-compose.yml as follows.
version: '3.4'

services:
  api:
    environment:
      - ASPNETCORE_ENVIRONMENT=Production
      - ASPNETCORE_URLS=http://+:80
      #- SQLSERVER=sqlserver connection string - loaded from api.env
    env_file:
      - api.env
We did two things here.
- Commented the SQLSERVER variable from environment section
- Created a new section env_file under api. It has path of api.env, which contains the SQLSERVER environment variable
.env file for db
Create a new file db.env in the main folder where .sln and docker-compose.yml are present. Copy the MSSQL_SA_PASSWORD=password part from db section of docker-compose.yml and paste as follows.
MSSQL_SA_PASSWORD=password
Now update the db section in the docker-compose.yml file as follows.
version: '3.4'
  db:
    environment:
      ACCEPT_EULA: "Y"
      MSSQL_PID: "Express"
      #MSSQL_SA_PASSWORD: password - loaded from db.env
    env_file:
      - db.env
We did two things here.
- Commented MSSQL_SA_PASSWORD from environment section of db
- Created a new section env_file under db. Now env.db contains the SA password
By creating .env files for each service, you can keep the secrets and passwords to local system. Commit the docker-compose.yml to public or development repository, so that the end user can install your software easily, without compromising the security.
How to tell your users about the secret and password environment variables?
Since you are not committing .env files, how will your users know which environment variables are required?
You can add a Readme.md file with details about the environment variables.
Or a better way is to use dummy values for secrets in comments. This way our users will know that SQLSERVER is required for api and MSSQL_SA_PASSWORD is required for db service. Also add a note in comments, either user may create his own .env or uncomment the lines in docker-compose.yml and provide his own secrets and passwords.