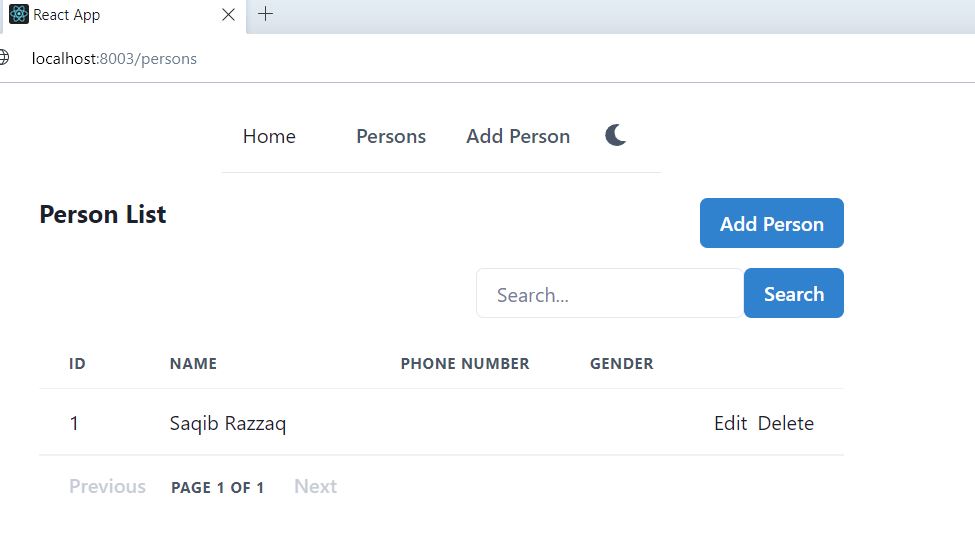
This is the 10th article in the beginner series of React UI for doing simple CRUD operations on single table. We ran the project using npm start on local system. In this tutorial, we will create a Docker container for the React app and deploy on local Docker.
This React app consumes Person web API, which we developed in ASP.NET Core 7. We used Visual Studio 2022 to add container support in the web API project. It generated docker-compose.yml and Dockerfile for the web API, which we modified according to our needs and deployed on local Docker. If you are following this series, at this point the web API should already be running in local Docker.
For this project, we will update two files for docker container deployment.
- Create Dockerfile in React app, which will build the app
- Update docker-compose.yml and add react_client section
Create Dockerfile for React web client app
Open the React app in Visual Studio Code. Create a new file at the root location, where package.json and .env.production files exist. Add the following code in the Dockerfile.
FROM node:alpine AS builder
ENV NODE_ENV production
WORKDIR /app
COPY package*.json .
RUN npm install
COPY . .
EXPOSE 80
RUN npm run build

FROM nginx:alpine as production
ENV NODE_ENV production
WORKDIR /app
# Copy built assets from builder
COPY --from=builder /app/build /usr/share/nginx/html
# Add your nginx.conf
COPY nginx.conf /etc/nginx/conf.d/default.conf
# Expose port
EXPOSE 80
# Start nginx
CMD ["nginx", "-g", "daemon off;"]
There is nothing special for our case in this Dockerfile. This is pretty much standard for common React apps. It uses two docker images, one for build and other for hosting.
It uses Node to build the source code. npm install command builds the project in /app folder. npm run build, runs the release build, port is 80 within the container.
NODE_ENV is set to production, which will read environment variables from .env.production file. Open the .env.production and make sure that you are using the correct url. Since we will run the production build on local docker, we will use localhost with port 8001. Note that 8001 port is specified in the docker-compose.yml file for the api service.
REACT_APP_API_BASE_URL=http://localhost:8001/api
It uses Nginx as a web server to host the React application. app files are copied in Nginx html public folder. You can add your nginx.conf as well. We have used the below nginx.conf file. Finally nginx server is started on port 80, inside the container.
server {
  listen 80;

  location / {
    root /usr/share/nginx/html/;
    include /etc/nginx/mime.types;
    try_files $uri $uri/ /index.html;
  }
}
Update docker-compose.yml and add React client service
As mentioned already we will update the docker-compose.yml file that we created for our web API. Open the web API project in Visual Studio 2022 and open docker-compose.yml.
The docker-compose.yml has two services currently, one for api and second for db. We will the 3rd service now. Update the docker-compose.yml as follows. We have omitted the contents of api and db sections here.
version: '3.4'

services:
  api:
    # api service

  db:
    # db service

  web:
    image: saqibrazzaq/person_web
    container_name: person_web
    environment:
      CHOKIDAR_USEPOLLING: "true"
    build:
      context: ./react-client
      target: production
    ports:
      - "8003:80"
      - "8004:443"
    stdin_open: true
    tty: true
    depends_on:
      - api
    restart: always
We have named the React web client service as web. It depends on api service, check the depends_on section. Image name is person_web, that name will appear in docker container list. The image name is saqibrazzaq/person_web, this is the name which will be used on dockerhub.com when we upload it to docker.com registry.
The context ./react-client contains the path of React web app folder. If you have a different folder name, please correct it. We have used both http and https ports. Inside the container, the React web app will use ports 80 and 443 (https). Outside the docker container, the React app will be accessible with ports 8003 and 8004 (https). Rest of the options are commonly used for React apps.
Save this file and run the batch file or run the commands below manually one by one.
docker compose stop
docker compose rm -f
docker compose build
docker compose create
docker compose start
Now the docker compose build command will build both web API and React app. For the first time, it will download the node and nginx images and the build process will take more time. After the build completes and docker containers are deployed, you can access the API and web app with the following URLs.
- API: http://localhost:8001/api/persons
- React web app: http://localhost:8003
Both these URLs should work now. These apps are now hosted from the Docker containers.
But we will still have one problem, open http://localhost:8003/persons, you will get NETWORK ERROR from Axios. This is due to CORS, the web API does not trust localhost:8003. Open web API in Visual Studio and open Extensions\ServiceExtensions.cs file. Add localhost:8003 origin in CORS in ConfigureCors method as below.
public static void ConfigureCors(this IServiceCollection services)
{
  services.AddCors(options =>
  {
    options.AddPolicy("CorsPolicy", builder =>
    {
      builder
      //.AllowAnyOrigin()
      .WithOrigins(
        "http://localhost:3000",
        "http://localhost:8003",
        "https://person-react.efcorebeginner.com")
      .AllowCredentials()
      .AllowAnyMethod()
      .AllowAnyHeader();
    });
  });
}
Bow rebuild and redeploy the web API and React app by running the batch file updatedocker.bat in the main folder, where .sln and docker-compose.yml file exists. After this update, the web API hosted inside Docker will allow API calls from localhost:8003.
