This is the 2nd tutorial in the React client app beginner series
Create a new folder src\layout. Create 3 new files in this folder.
- Header.tsx
- TopNavBar.tsx
- Footer.tsx
- Layout.tsx
The names of each file is self explanatory.
Visual Studio Code extensions for React Development
We used Visual Studio Community 2022 version for the development of our web API. It is a Microsoft IDE for pure Microsoft related projects.
But for React client app development, we are using Visual Studio Code. It is a generic IDE that supports development of a vast number of programming languages and platforms.
We used node.js and npm to create the default React app, not Visual Studio Code. Visual Studio Code is used for code editing. When we create a new file e.g. Header.tsx in Visual Studio Code, it will just create an empty file. It does not add default React code, like Visual Studio did for default API controller code.
Visual Studio Code comes with a lot of extensions from the developer community, to support their favorite programming languages. Open Extensions from the left menu in Visual Studio Code. Search and install the following extensions, which will help in React development.
- Auto Rename Tag – It automatically renames the start and end HTML tags
- Better TOML – syntax highlighting for TOML files
- ES7+ React/Redux/React-Native/JS snippets – We will use it a lot to create default function in empty React tsx files.
- Prettier Code Formatter – It auto formats and wraps the code based on the maximum line length
Footer.tsx
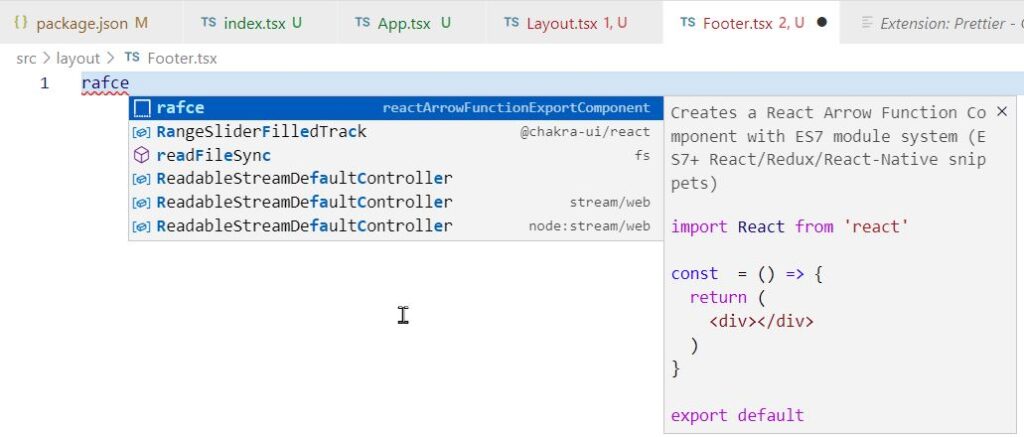
Open src\layout\Footer.tsx. It will be empty by default. Type rafce, if the ES7 + React/Redux extension is installed, you will see the helper menu to add template code like below.

Press Enter on the rafce – reactArrowFunctionExportComponent to insert the default code. It will create the Footer functional component as below.
import React from 'react'

const Footer = () => {
  return (
    <div>Footer</div>
  )
}

export default Footer
Save the Footer.tsx file. We will leave as it is.
TopNavBar.tsx for Top navigation menu
Create src\layout\TopNavBar.tsx file. Enter rafce to automatically insert the default code.
In this file, we will add the top menu using the Chakra UI. After the import statements, before the const TopNavBar method, add an interface NavItem as follows.
interface NavItem {
  name: string;
  subLabel?: string;
  children?: Array<NavItem>;
  href?: string;
}
This interface will define an individual menu item. name and subLabel both are the text which is displayed on the menu item. href is the url of the menu item. children is an array of menu items, we will set it if we have submenus.
Inside the TopNavBar function, add a state variable of type Array. We will load the top menu into this state variable. We will also add useDisclosure for open/close toggle state of menu.
const { isOpen, onToggle } = useDisclosure();
const [navItems, setNavItems] = useState<Array<NavItem>>([]);
To initialize the menu items on load, we will add a useEffect() hook. To set the menu items, we will create a new array and set the array in state variable as follows.
useEffect(() => {
  setTopMenu();
}, []);

const setTopMenu = () => {
  const menuItems: Array<NavItem> = [
    {
      name: "Persons",
      href: "/persons",
    },
    {
      name: "Add Person",
      href: "/persons/edit",
    },
  ];
  setNavItems(menuItems);
}
useEffect is calling setTopMenu. In setTopMenu we are creating the array for menu items. It has 3 simple links for Persons and Add Person. We will create these pages later.
There are many other things in the TopNavBar.tsx related to the Chakra UI components, how it displays menu for desktop and mobile. You can copy the complete code from the following GitHub repository.
https://github.com/saqibrazzaq/efcorebeginner/blob/main/Person/react-client/src/layout/TopNavBar.tsx
Header.tsx that include global header
Add a new file Header.tsx in src\layout folder. The header will include global header elements. Currently we will only add the top navigation menu bar. We will might something else later. See the code below for Header.
import { VStack } from '@chakra-ui/react'
import TopNavBar from './TopNavBar'

const Header = () => {
  return (
    <VStack>
      <TopNavBar />
    </VStack>
  )
}

export default Header
Layout.tsx file for Global app layout
Add a new file Layout.tsx in src\Layout folder. Here we will define the global layout for our app. We will have header, content and footer in vertical stack. The layout is pretty simple.
Write rafce and insert the default template code. The complete code should look like below.
import { Box, ChakraProvider, Grid, theme, VStack } from '@chakra-ui/react'
import { Outlet } from 'react-router-dom'
import Footer from './Footer'
import Header from './Header'

const Layout = () => {
  return (
    <ChakraProvider theme={theme}>
      <Box>
        <Grid p={3}>
          <VStack spacing={1}>
            <Header />
            <Box minH={"80vh"}>
              <Outlet />
            </Box>
            <Footer />
          </VStack>
        </Grid>
      </Box>
    </ChakraProvider>
  )
}

export default Layout
The layout uses theme from Chakra UI. Our app will support light and dark theme. The color mode switcher was included in the TopNavBar.tsx. Box minimum height is 80vh, which means, the content will cover the 80% visible height of the screen.
Use Layout in App.tsx
Now back to the App.tsx file. So far we have defined header, top menu and layout. But we have not used this layout anywhere. The starting point of the React app is Index.tsx, which calls App.tsx. So we will use App.tsx to provide our layout in the default URL.
Add a new Route in Routes component. Set path to “/”, element to Layout, which means the default homepage will render the Layout file in browser.
The function App should return the following now
<BrowserRouter>
  <Routes>
    <Route path="/" element={<Layout />} />
  </Routes>
</BrowserRouter>
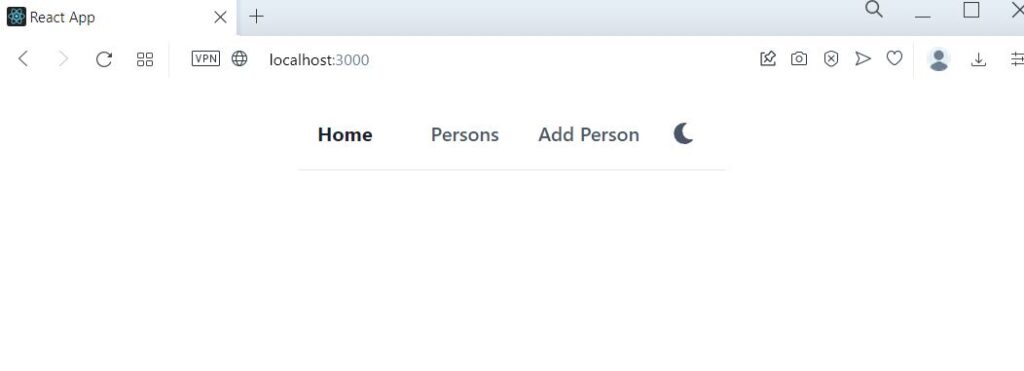
Now save the app and run using npm start. If your app is already running, the updates in code will automatically be applied in browser. The app should look like below for default home page.

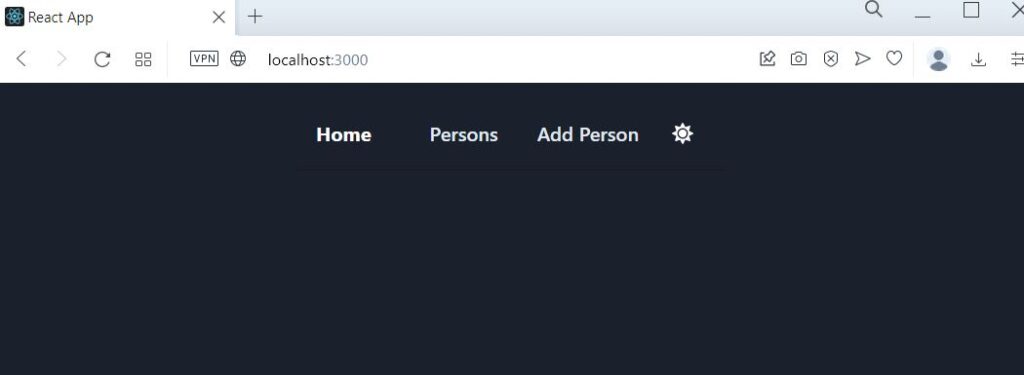
The menu is very minimal, but elegant. The left most button is Home, which opens /. Persons and Add Persons are the menu items we set in TopNavBar. The rightmost icon is the color switcher. It is functional. Click on it to see its effect.

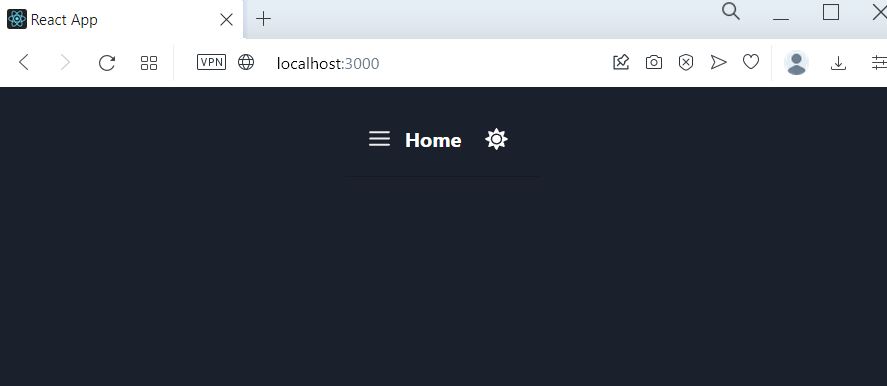
Resize the window to smaller width, it will open the mobile navigation menu like below. The layout and menu is responsive.

Add Home page
Add a new folder src\home. In this folder add a new file Home.tsx. Write rafce and insert the default code.
const Home = () => {
  return (
    <div>Home</div>
  )
}

export default Home
Open App.tsx. We have give / route to the Layout, which means if we open localhost or websiteaddress.com, it will open the layout. Inside the Route path=”/”, add a new index Route element, which will open on the default / route.
<BrowserRouter>
  <Routes>
    <Route path="/" element={<Layout />}>
      <Route index element={<Home />} />
    </Route>
  </Routes>
</BrowserRouter>
Now save and see the app in browser. You will see that localhost:3000 now shows content of Home.tsx. Previously it was only showing Header and Footer.
Note that we used Outlet in the Layout.tsx, which means the child components will be displayed in the place of Outlet. Below diagram may help in explaining this concept.

The / route uses the Layout.tsx, which is the outermost Route.
All the other Routes that want to use the same layout, must be inside the main Route. All the inside Route elements will be rendered in place of the Outlet component.

The app in browser should now look like the screenshot above. localhost:3000 shows the content of Home component and uses the Layout.
In the next articles, we will setup Axios, an http client library, for calling the web api.