Rate limiter is a new feature introduced in Microsoft .NET 7. Before .NET 7, we had to use 3rd party packages to add rate limit in our APIs.
What is Rate Limit?
In simple words, it is the maximum number of requests the API is allowed to accept in a given time. For example you can set the limit to 10 requests per minute. With this setting, the API will only accept 10 requests and reject the 11th and subsequent requests.
How to add in your API?
It is available as middleware and can easily added to the service collection. You can either directly add it in Program.cs. But its better to configure it in an extension method, so that the rate limit configuration is separated from the main Program.cs. The startup file will look clean this way.
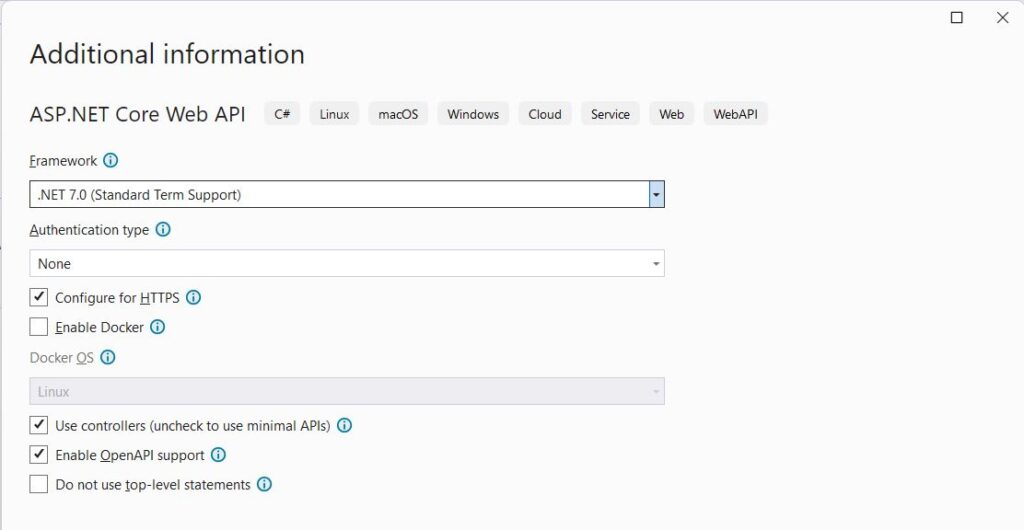
Create a new project of type ASP.NET Core Web API in Visual Studio 2022. Choose .NET 7.0 in framework, as this feature is only introduced in .NET 7. It is not available in .NET 6. Leave other options as default.

Add a new folder named Extensions. In this folder add a new class ServiceExtensions. Modify the class to make it static. We will define the extension method here, which requires a static class. Add the new method as follows.
public static class ServiceExtensions
{
  public static void ConfigureRateLimit(this IServiceCollection services)
  {
    services.AddRateLimiter(options =>
    {
      options.GlobalLimiter = PartitionedRateLimiter.Create<HttpContext, string>(httpContext =>
        RateLimitPartition.GetFixedWindowLimiter(
          partitionKey: httpContext.User.Identity?.Name ?? httpContext.Request.Headers.Host.ToString(),
          factory: partition => new FixedWindowRateLimiterOptions
          {
            AutoReplenishment = true,
            PermitLimit = 10,
            QueueLimit = 0,
            Window = TimeSpan.FromMinutes(1)
          }));
    });
  }
}
In this method, we are registering a new middleware, the built-in rate limiter for web API. We are setting the following options here.
- The limit applies globally, irrespective of session, user, browser, IP address etc.
- 10 requests per minute
Open Program.cs and add this service like below.
// Add services to the container.
builder.Services.ConfigureRateLimit();
The above line registers the rate limiter middleware by calling the extension method. We can add and configure multiple middleware services this way, without having to make Program.cs file messy and complex.
The 3rd and final step is to use this rate limiter in the app. Call the following method before app.Run as follows.
app.UseRateLimiter();
app.Run();
Run and Test the API
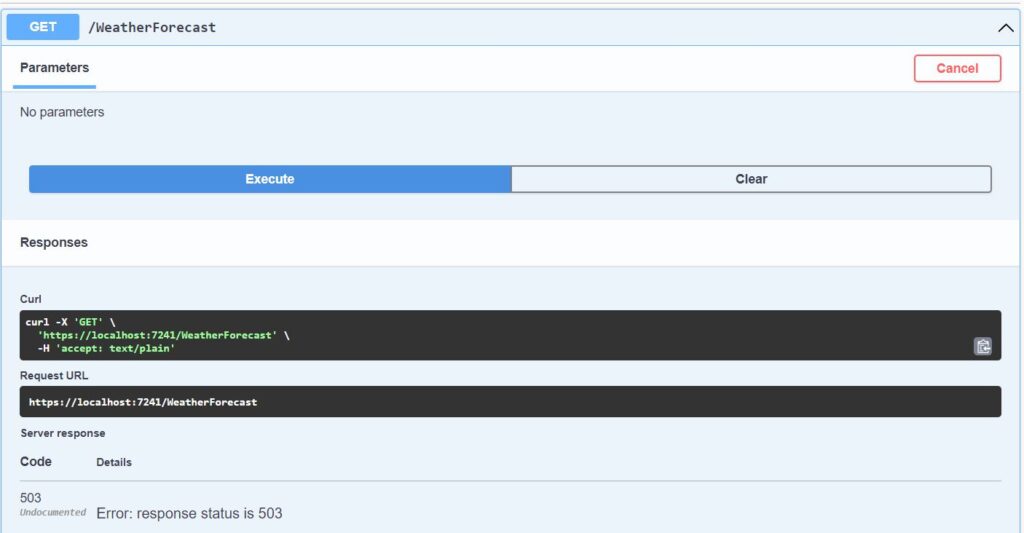
Run the API, it will open the default Swagger UI. Execute the default WeatherForecast GET method continuously. It will work first 10 times. 11th time, it will return 503 error response. The controller method will not be executed. You have to wait for 1 minute, before you can do another request. Wait for 1 minute and execute again.

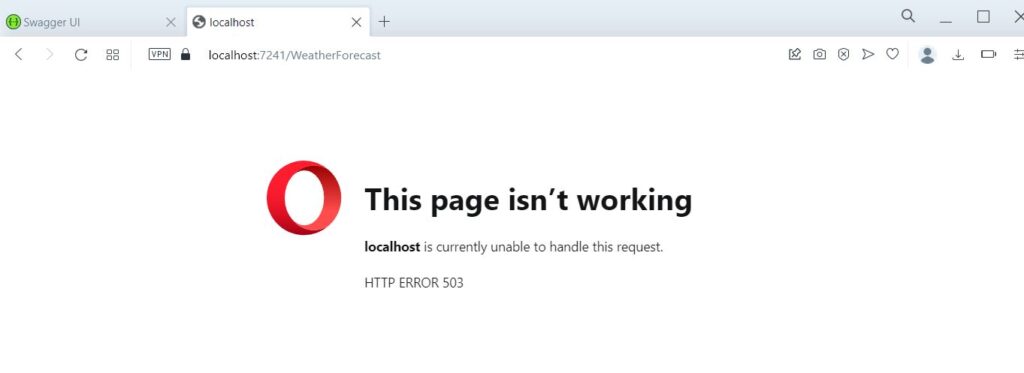
Open the API GET Url https://localhost:7241/WeatherForecast directly in the browser, you will get the default 503 error page in browser. Below screenshot shows how it appears in Opera browser.

Customize Error code and message
The default 503 error does not tell explicitly about the rate limit. This error just tell client that the service is not available. The client might think that the server is down.
We can send http error code 429 Too many requests response instead of 503 service error response. This will tell the client that you have reached the maximum number of allowed requests and should wait to make another request.
Update the extension method as follows.
public static void ConfigureRateLimit(this IServiceCollection services)
{
  services.AddRateLimiter(options =>
  {
    options.GlobalLimiter = PartitionedRateLimiter.Create<HttpContext, string>(httpContext =>
      RateLimitPartition.GetFixedWindowLimiter(
        partitionKey: httpContext.User.Identity?.Name ?? httpContext.Request.Headers.Host.ToString(),
        factory: partition => new FixedWindowRateLimiterOptions
        {
          AutoReplenishment = true,
          PermitLimit = 10,
          QueueLimit = 0,
          Window = TimeSpan.FromMinutes(1)
        }));
      options.RejectionStatusCode = 429;
  });
}
Now run the project and execute the default GET request 10+ times. You will get the 429 error code. Open the URL https://localhost:7241/WeatherForecast directly in the browser. Now you will see the default 429 error page in the browser like below.

But it still does not convey the proper error message. The browser understands the error code, but we need to send the response more clearly in message. We can modify the response text as below.
services.AddRateLimiter(options =>
{
  options.GlobalLimiter = PartitionedRateLimiter.Create<HttpContext, string>(httpContext =>
    RateLimitPartition.GetFixedWindowLimiter(
      partitionKey: httpContext.User.Identity?.Name ?? httpContext.Request.Headers.Host.ToString(),
      factory: partition => new FixedWindowRateLimiterOptions
    {
        AutoReplenishment = true,
        PermitLimit = 10,
        QueueLimit = 0,
        Window = TimeSpan.FromMinutes(1)
      }));
  options.RejectionStatusCode = 429;
  options.OnRejected = async (context, token) =>
  {
    if (context.Lease.TryGetMetadata(MetadataName.RetryAfter, out var retryAfter))
    {
      await context.HttpContext.Response.WriteAsync(
        $"Too many requests. Please try again after {retryAfter.TotalMinutes} minute(s). ",
        cancellationToken: token);
    }
    else
    {
      await context.HttpContext.Response.WriteAsync(
        "Too many requests. Please try again later. ",
        cancellationToken: token);
    }
  };
});
Now run the API project and open the URL https://localhost:7241/WeatherForecast directly in the browser. Refresh the page 10 times, the API will be executed. 11th time you will get text response as follows.

Now this code is usable for API clients like React using Axios or other http library. You can display proper message to the client that the API has reached the maximum number of requests allowed. And it should wait to make another request.
You can see the full source code in this GitHub repository https://github.com/saqibrazzaq/efcorebeginner/tree/main/blog/RateLimiter.
This project applies global rate limit to the API, which is not suitable for a project with multiple users. If one user makes 10 requests in one minute, other users will not be able to call the API. Ideally it should limit the API calls for each logged in user. We will cover it soon in another blog post.
